2.5 Generating BioCompute Objects with BCO App
The following example details generating a BCO from a CWL workflow on the Cancer Genomics Cloud. We selected this example because the Platform Composer includes elements of the text composer and the CWL composer. Reading through the example will outline the steps required to generate a BCO object.
2.5.1 Platform Composer
2.5.2 Step 1 - Import the Target CWL App
After you click the “Platform Composer” page of the BCO App under the “Generators” tab, you will see the initial step of the BCO generation, the Import step:
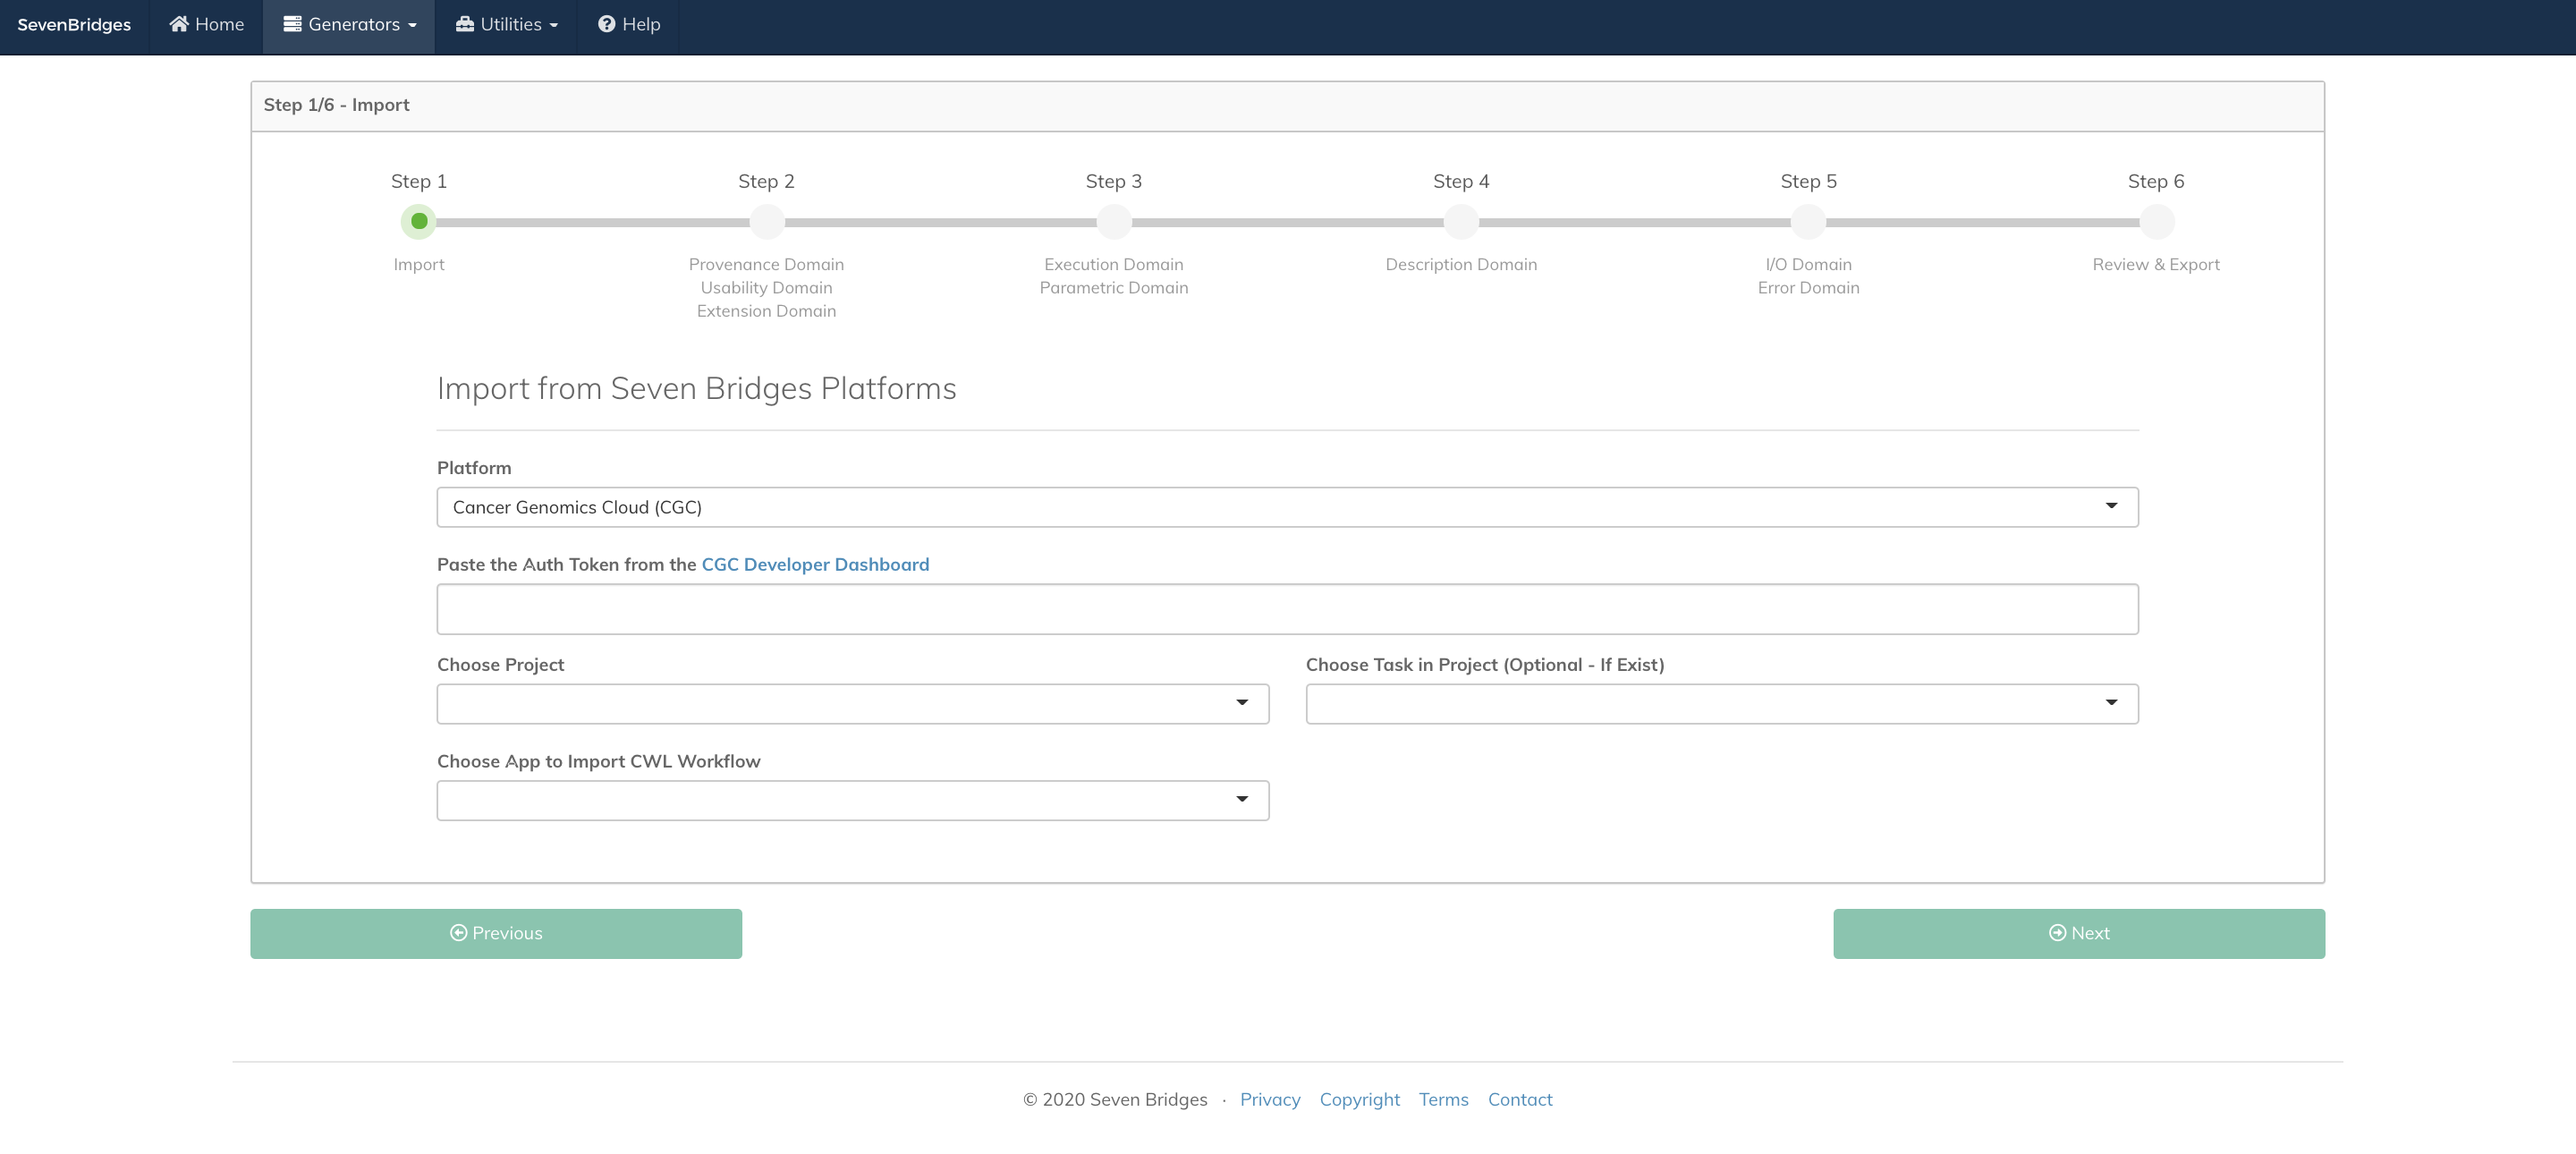
Initial Page of the Platform Composer
The BCO Creator/Composer includes six steps, each step corresponding to a BCO domain, to generate a new BioCompute Object (BCO):
Step 1: Import workflow written Common Workflow Language (CWL).
Step 2: Set BCO fields in the Provenance, Usability, and Extension Domains.
Step 3: Set BCO fields in the Execution and Parametric Domains.
Step 4: Set the Description Domain fields.
Step 5: Set the fields in the I/O and Error Domain.
Step 6: Generate BCO
Once user entry is completed, you can generate and review the BCO associated with the workflow. A generated BCO can be downloaded, published to a Git page, and uploaded to your Seven Bridges platform.
This first Import step (Figure 3) collects the following information from you to initiate the generation process: Platform, Authentication Token, Project, Task of the Project (optional), and Application Name. Select a name for a Platform that you want to fetch a CWL file of an application.
Required Platform Composer
After that, paste your authentication token to “Paste the auth token from…” field. Colored text in the name of the field is a direct link to the authentication token page of the selected platform (See Appendix I for additional information). Projects, tasks, and applications that exist in the account of the user will be fetched once a valid authentication token is entered. Finally, the target application can be selected from “Choose the CWL workflow to import” field to fetch a CWL of a target application to work with to generate a BioCompute Object. Optionally, a user could selected an completed task at this step which would include the workflow information in the generated CWL.
2.5.3 Step 2 - Provenance, Usability, and Extension Domains
In step 2, User enters Provenance, Usability, and Extension Domains of BCO.
The BCO App automatically enters some fields from information parsed from the selected CWL workflow. Users are prompted to complete the remaining fields. You can find the complete detailed list of Provenance, Usability, and Extension Domain fields in Appendix II. See Figure 4 and 5 for Provenance Domain Entry fields.
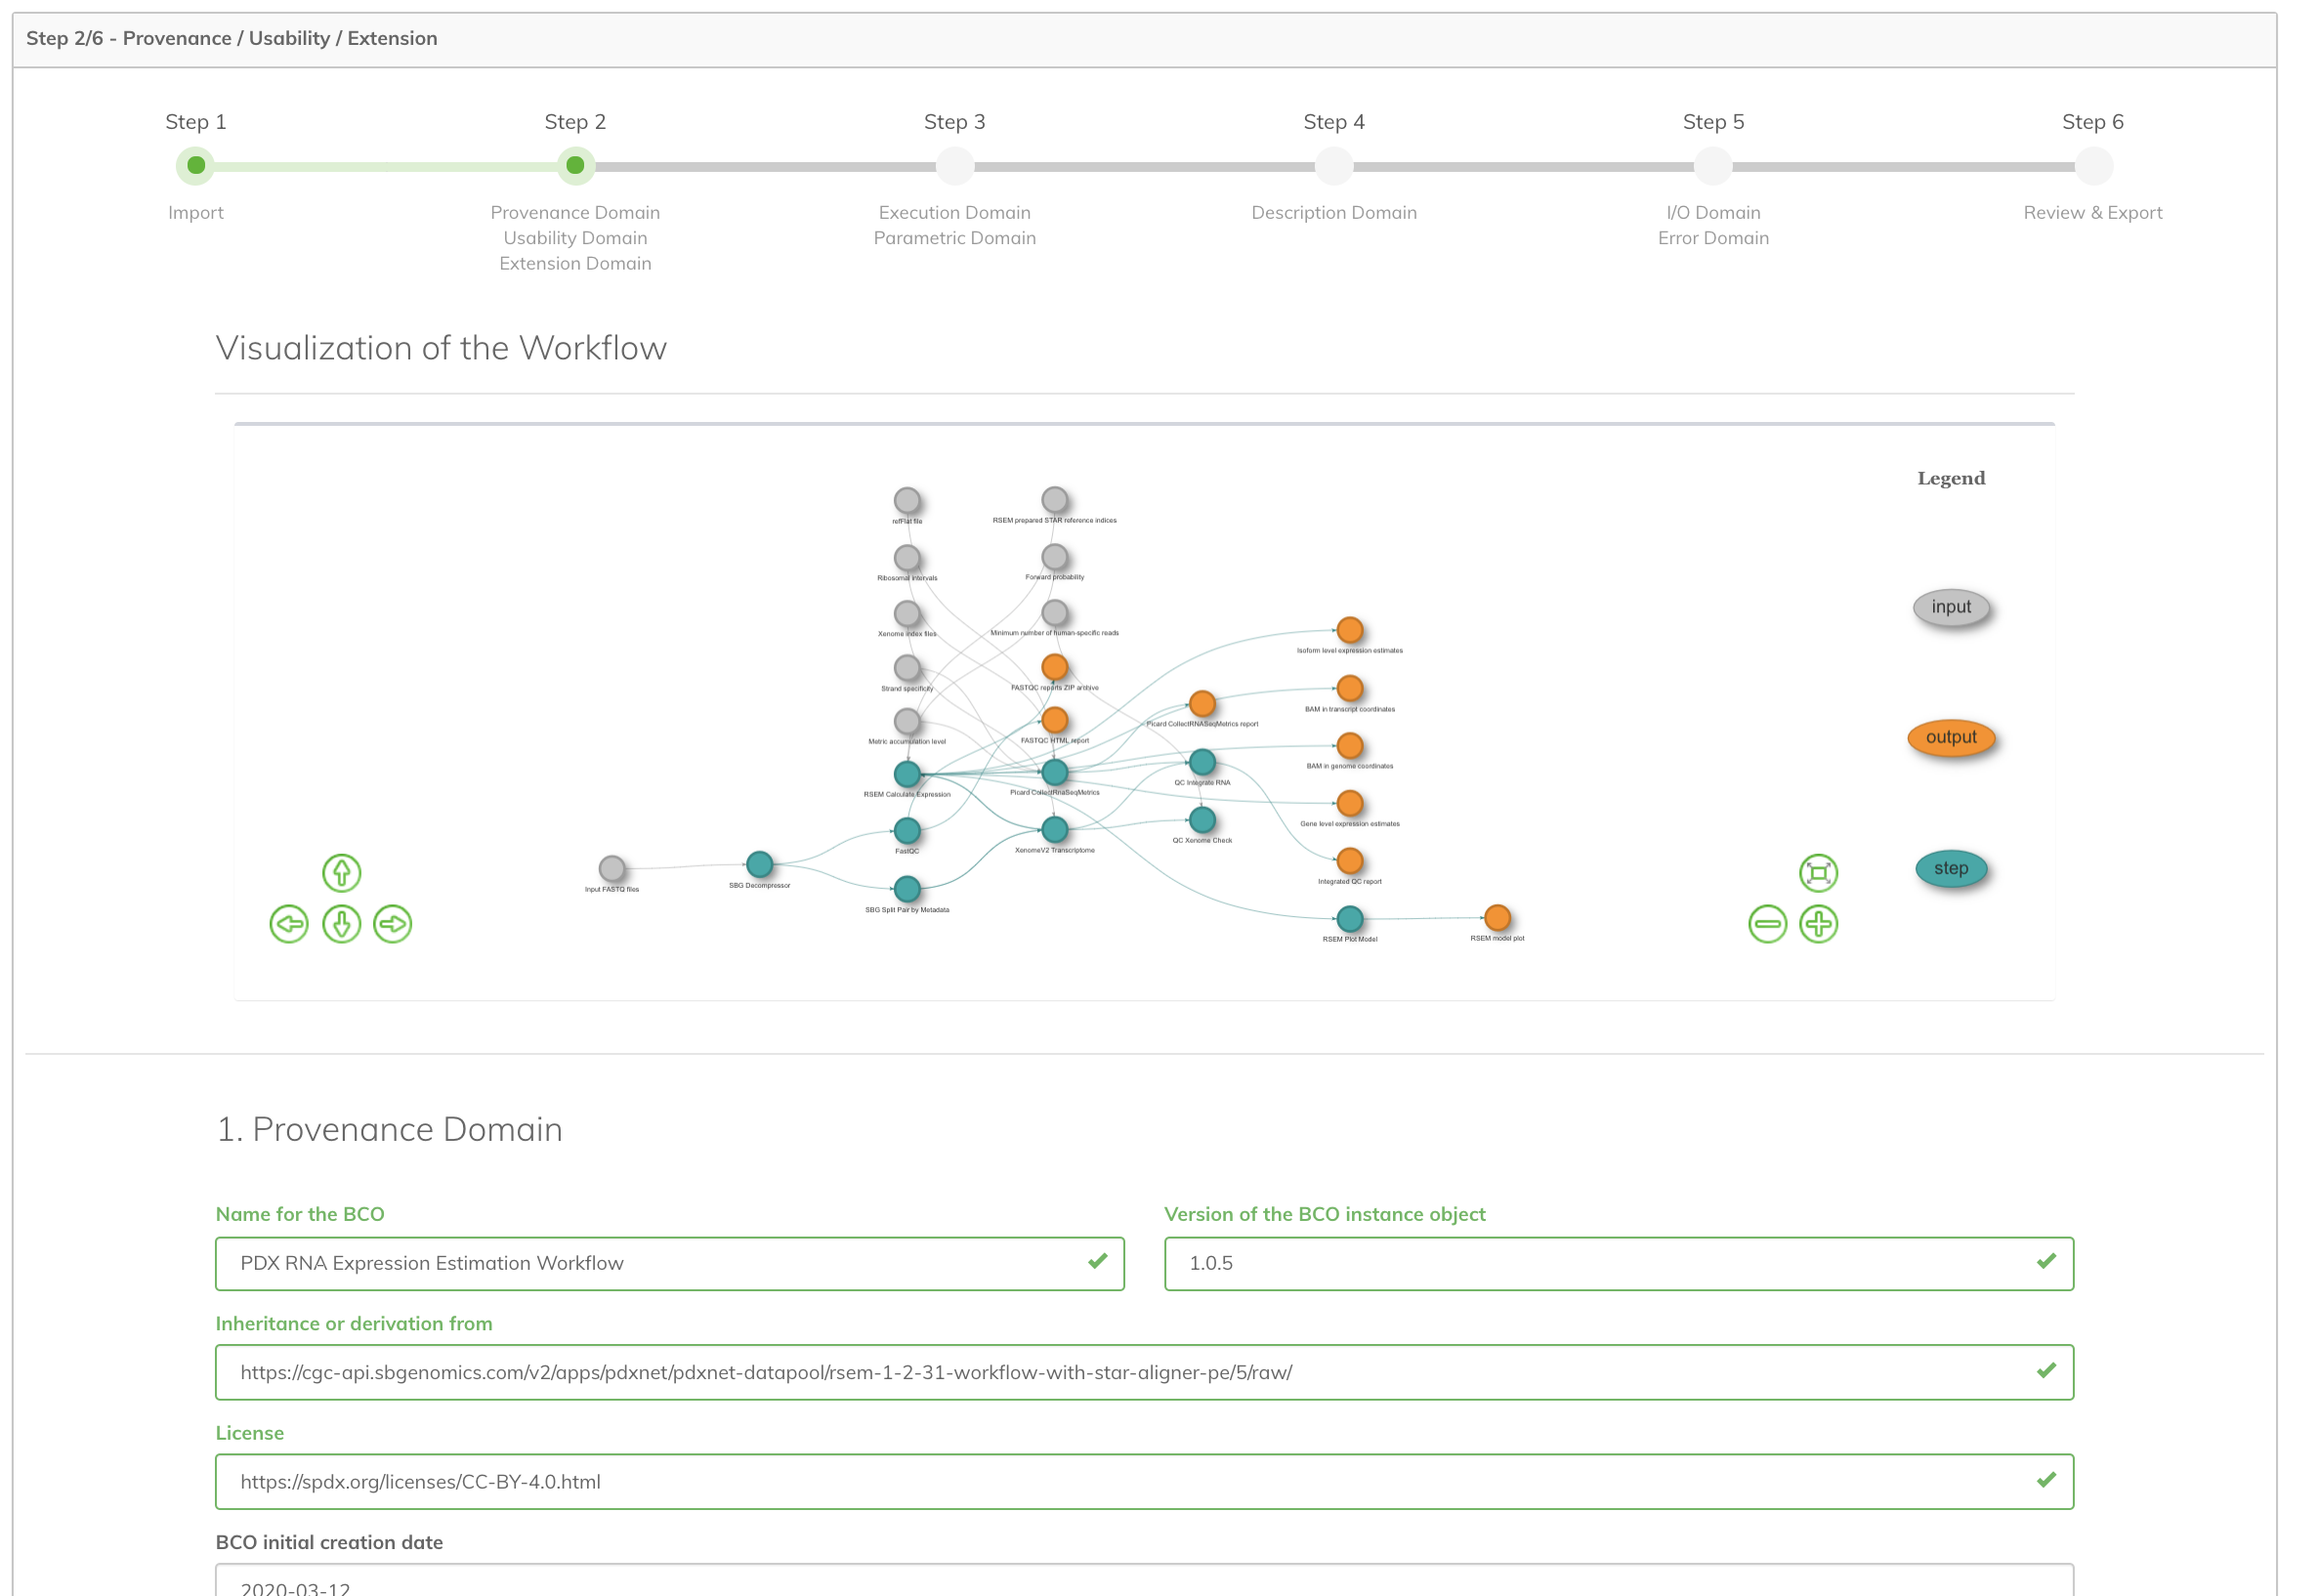
Example of Provenance Domain fields automatically filled by the BCO App.
Example of Provenance Domain Fields to be entered by the user.
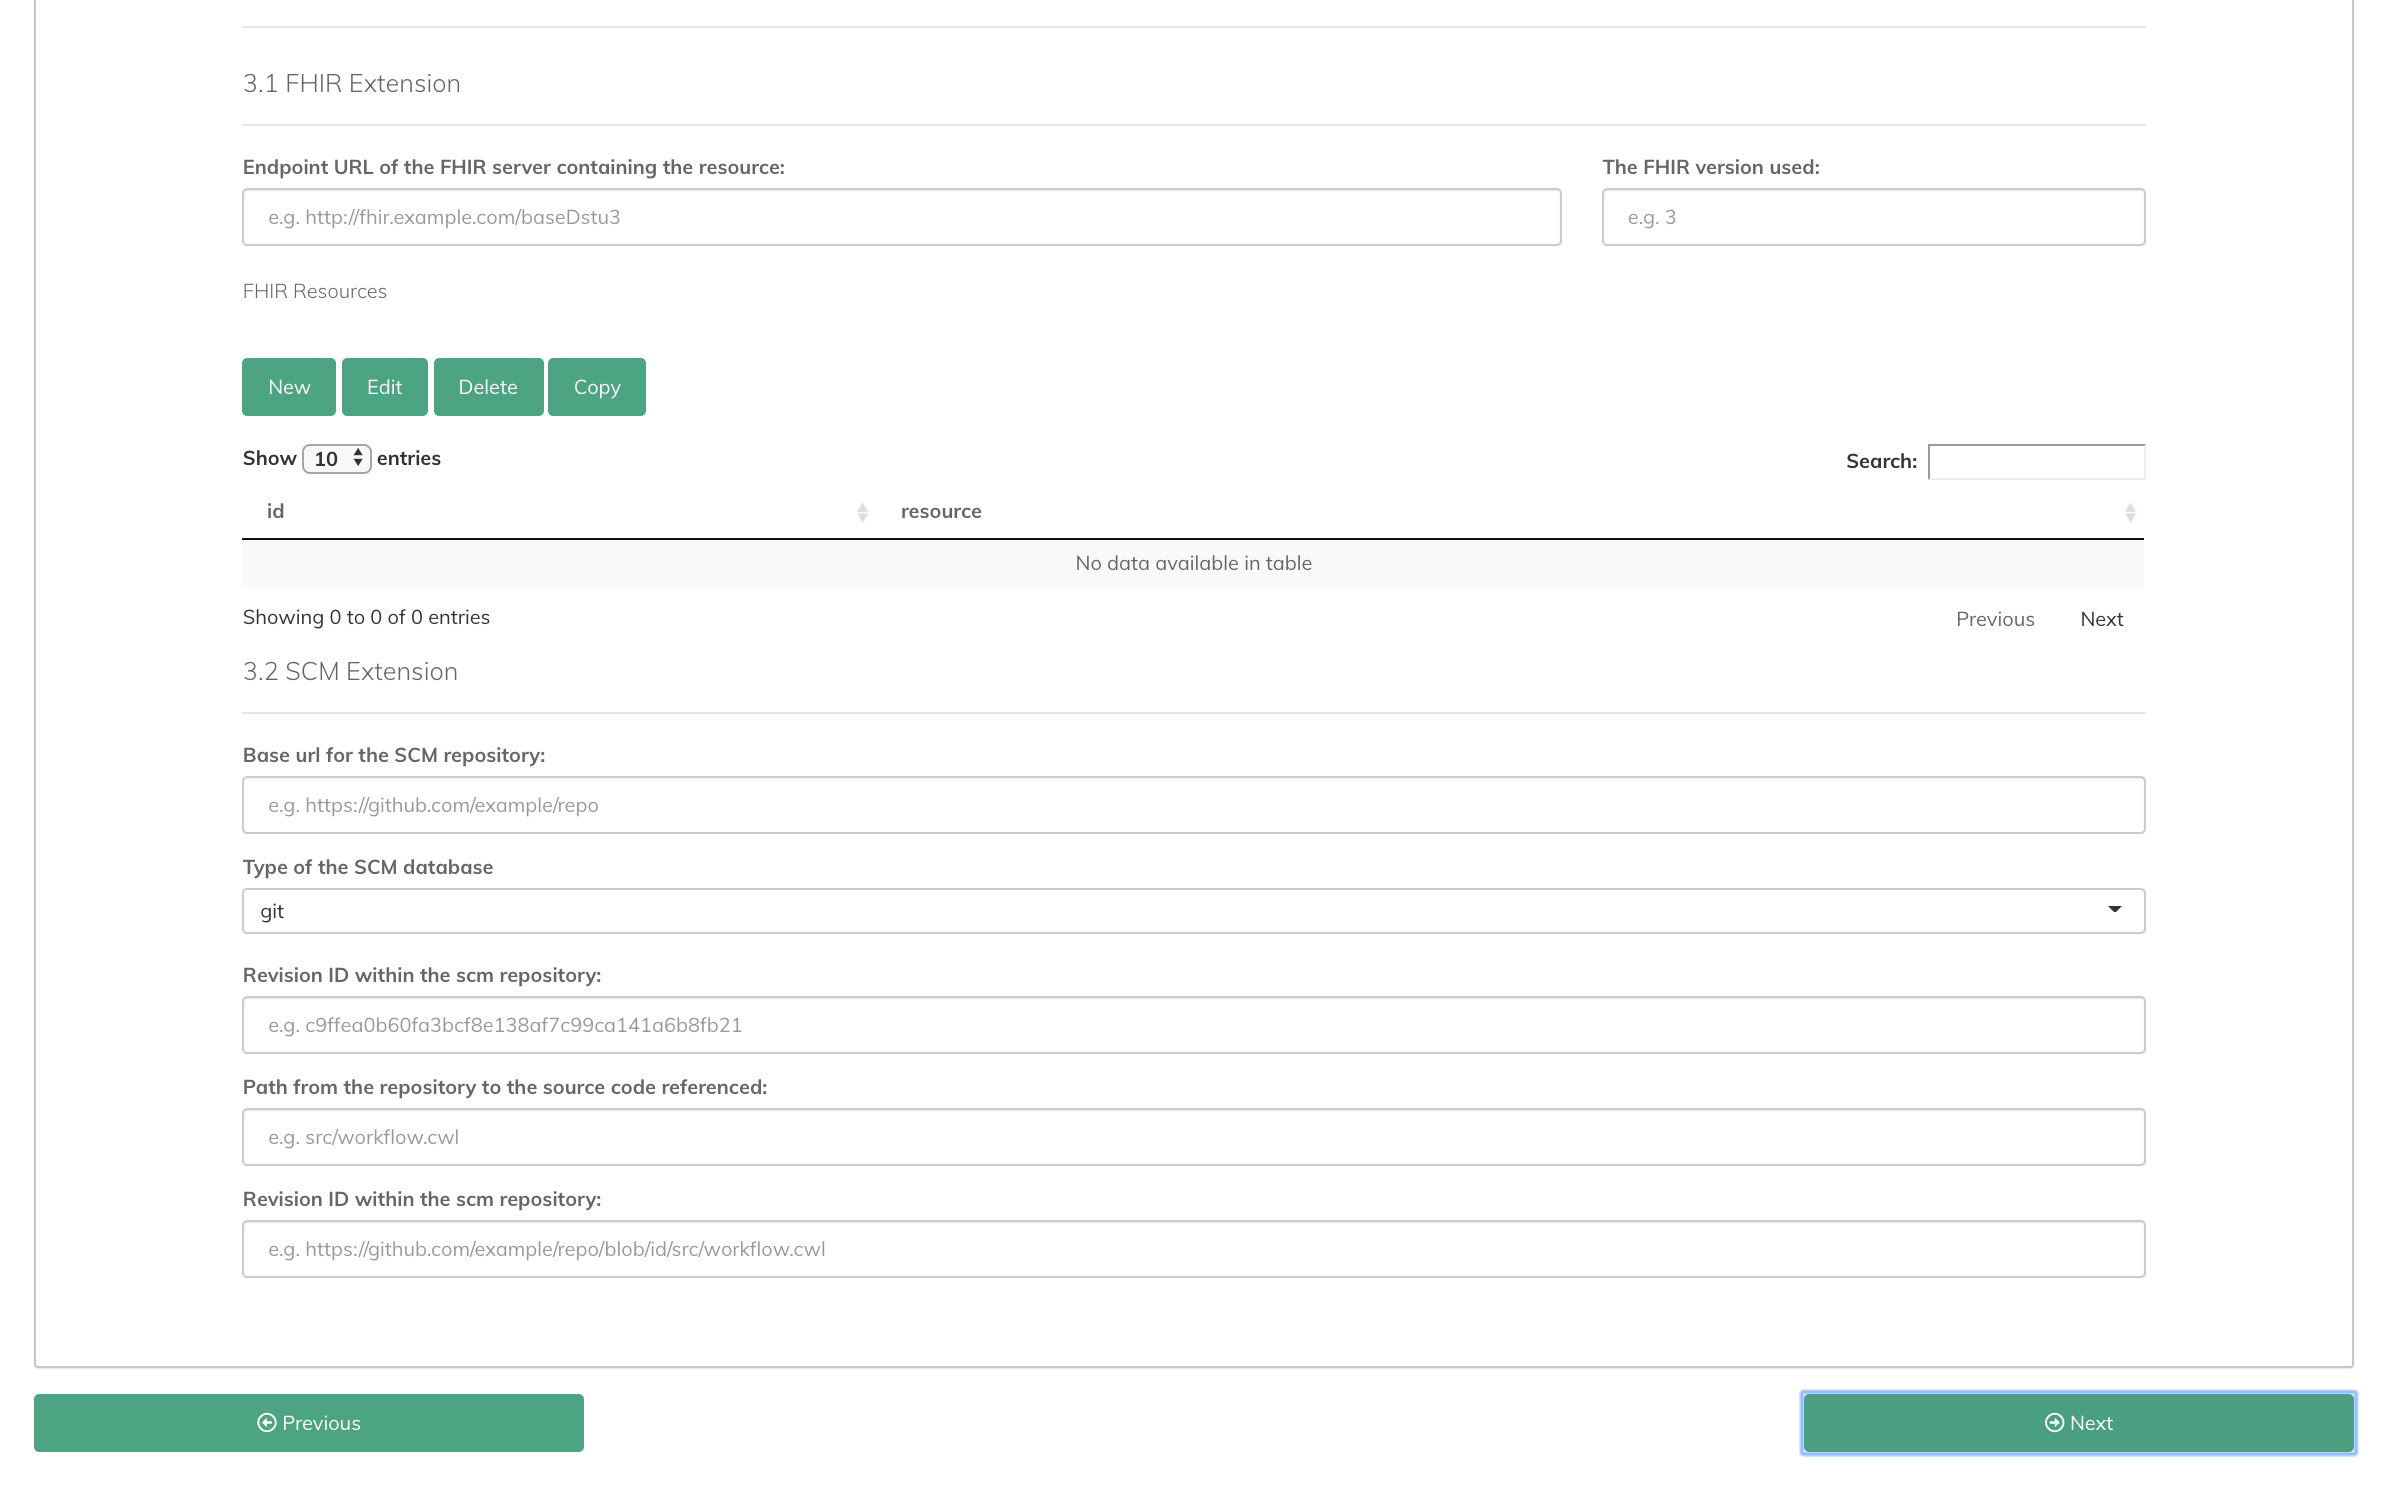
2.5.4 Step 3 - Execution and Parametric Domains
In step 3, You are prompted to enter text in the Execution and Parametric Domains fields. Some entries will spark a pop up box as shown in Figure 6. See Appendix II for a complete list of fields in the Execution and Parametric Domain.
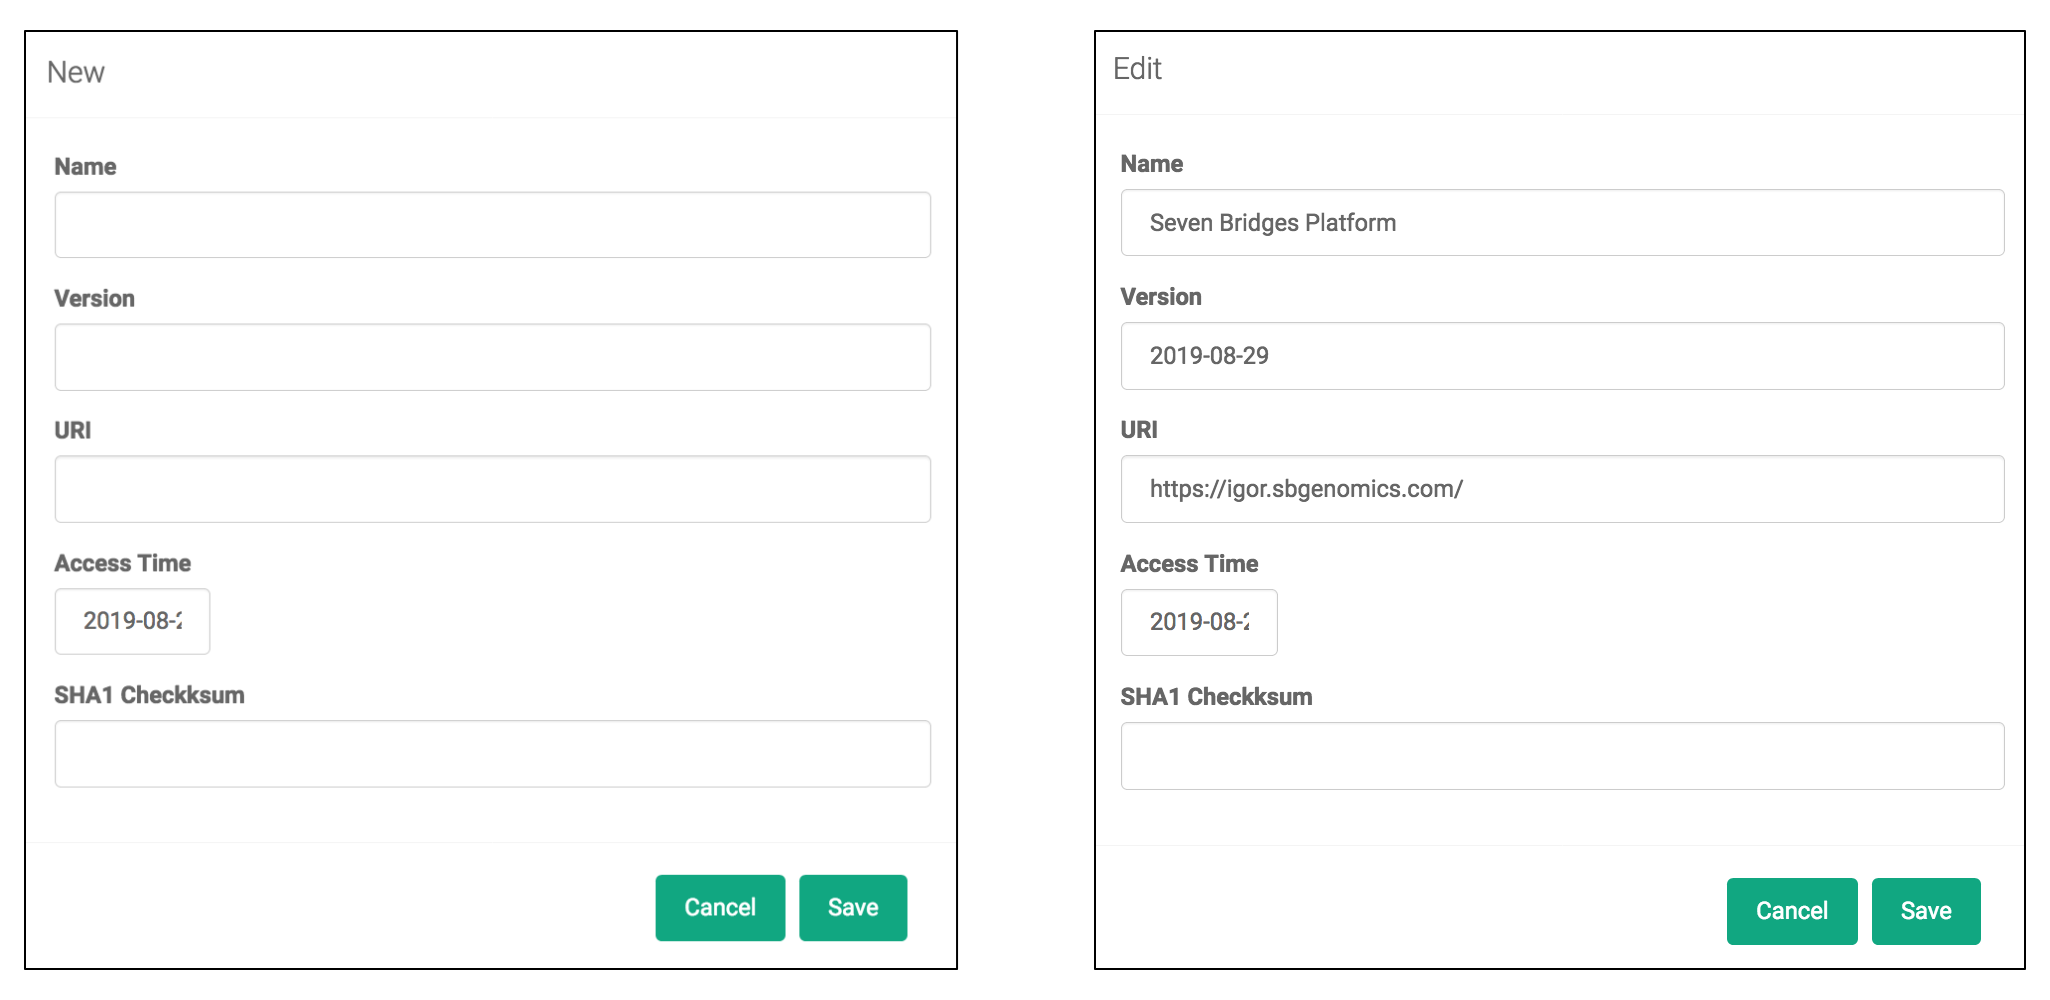
Example of adding a new entry or editing existence one in the field.
2.5.5 Step 4 - Description Domain
The user is prompted to enter information from the in the Description Domain. Some of the fields will be pre-populated as shown in Figure 7. See Appendix II for a complete list Description Domain fields.
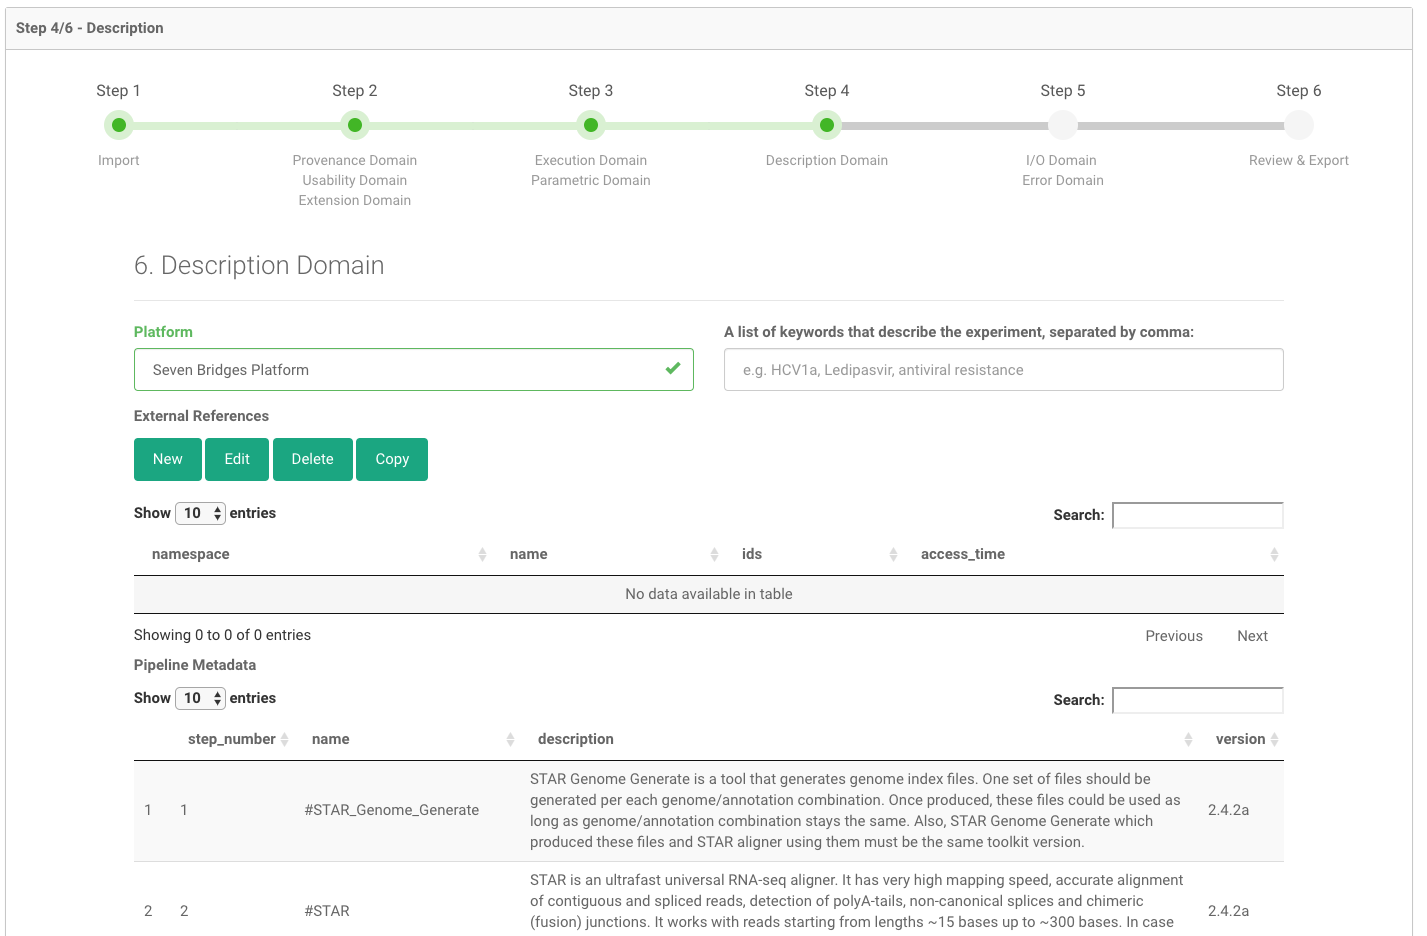
Description Domain example from Step 4
You can find the complete list of the details of the Description Domain fields in Appendix II and Table 5.
2.5.6 Step 5 - I/O and Error Domain
Next, you are prompted to enter information for the I/O and Error Domains. Some of the fields will be pre-populated as shown in Figure 8 and 9 below. You can find the complete detailed list of I/O and Error Domains’ fields in Appendix II.
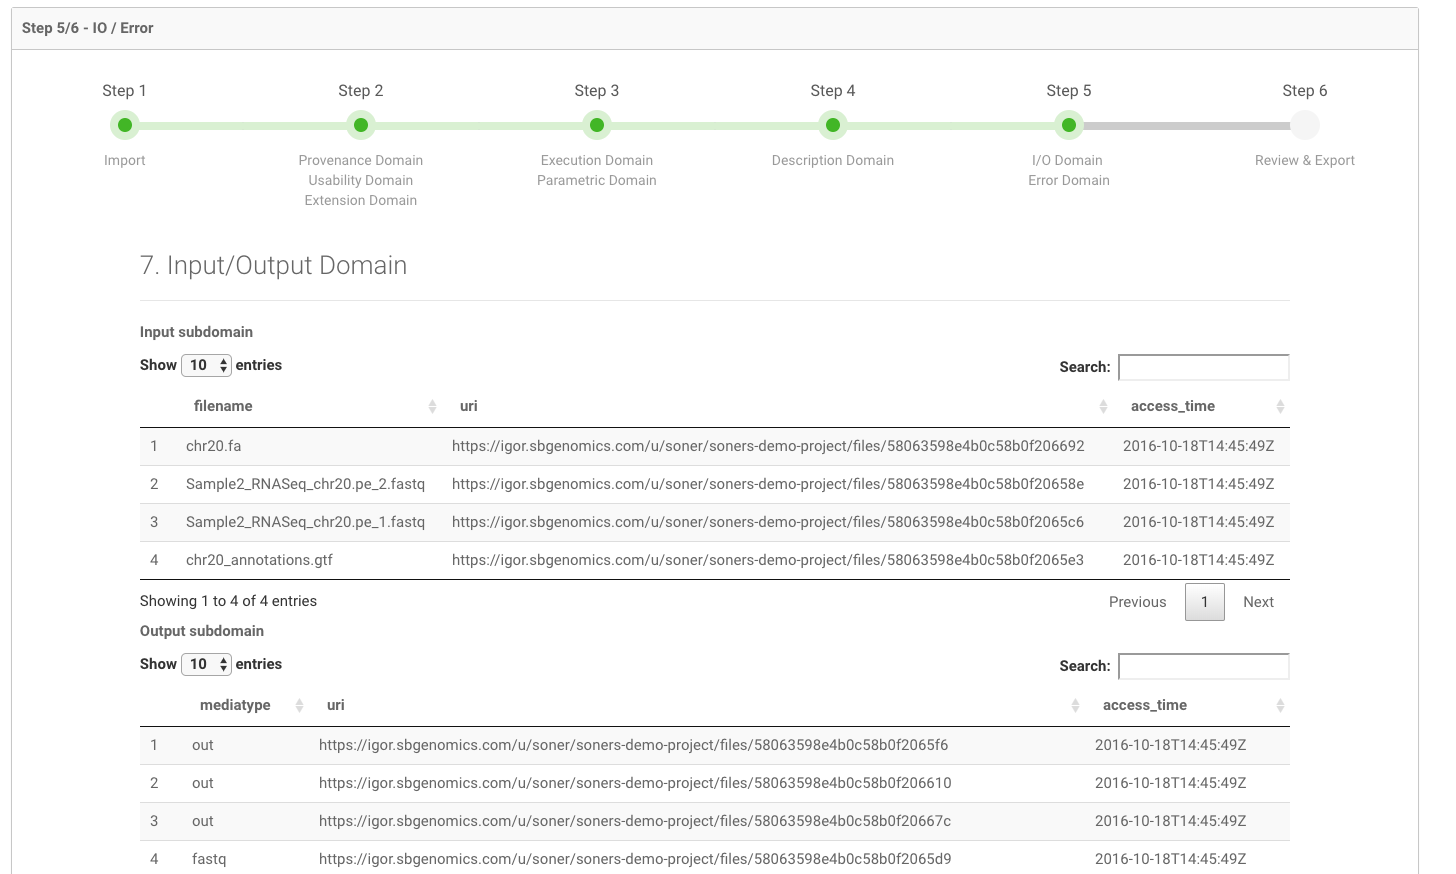
I/O Domain example from Step 5
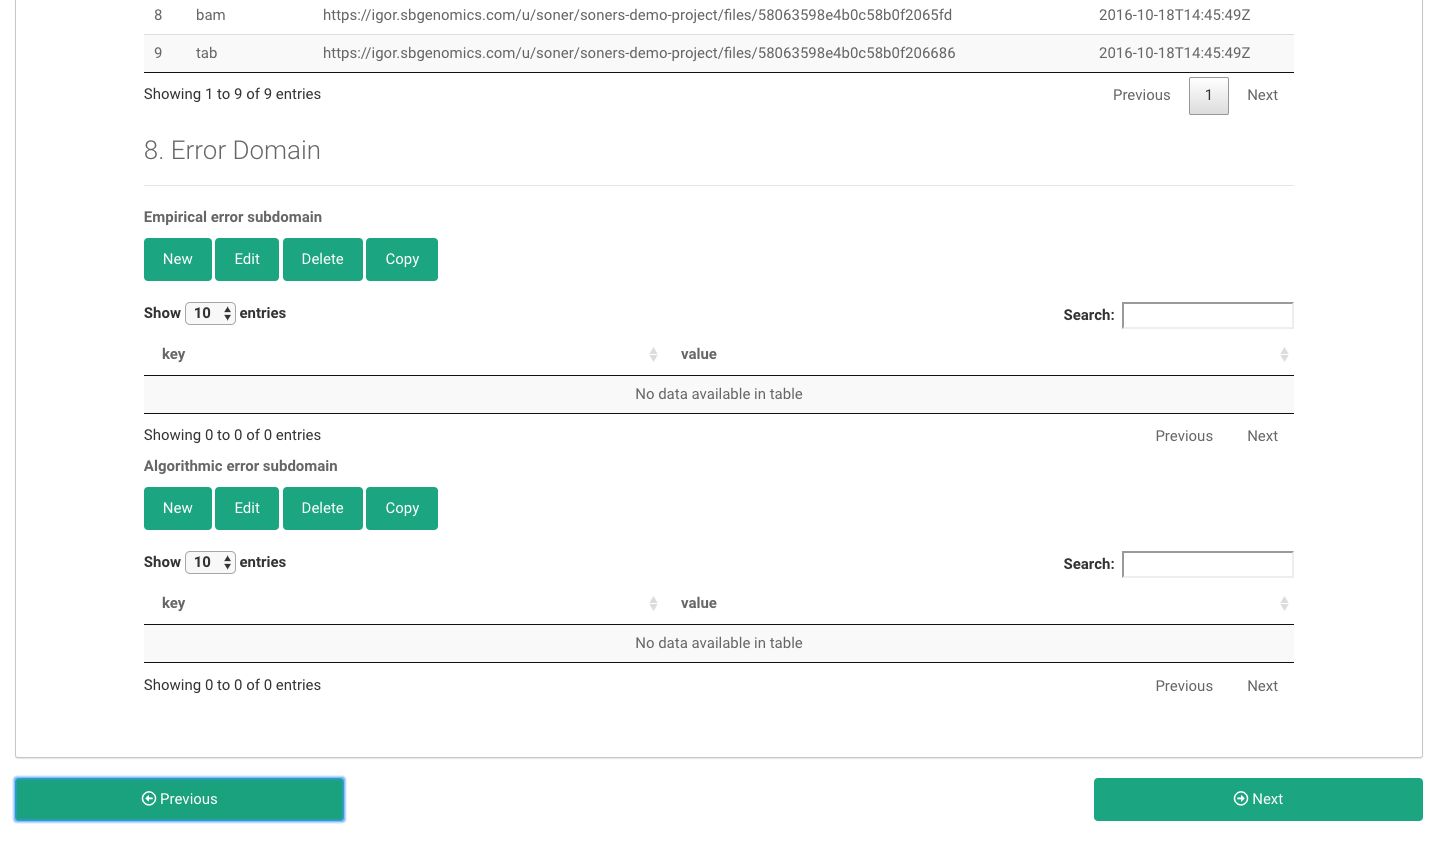
Error Domain example from Step 5
You can find the complete detailed list of I/O and Error Domains’ fields in Appendix II, Table 8, and Table 9.
2.5.7 Step 6 - Review and Export
As the last step of BCO Composer, you can review your generated BCO file in “Review & Export” after “Generate & Preview BCO” button is clicked. The BCO ID of the generated BCO file is automatically assigned:
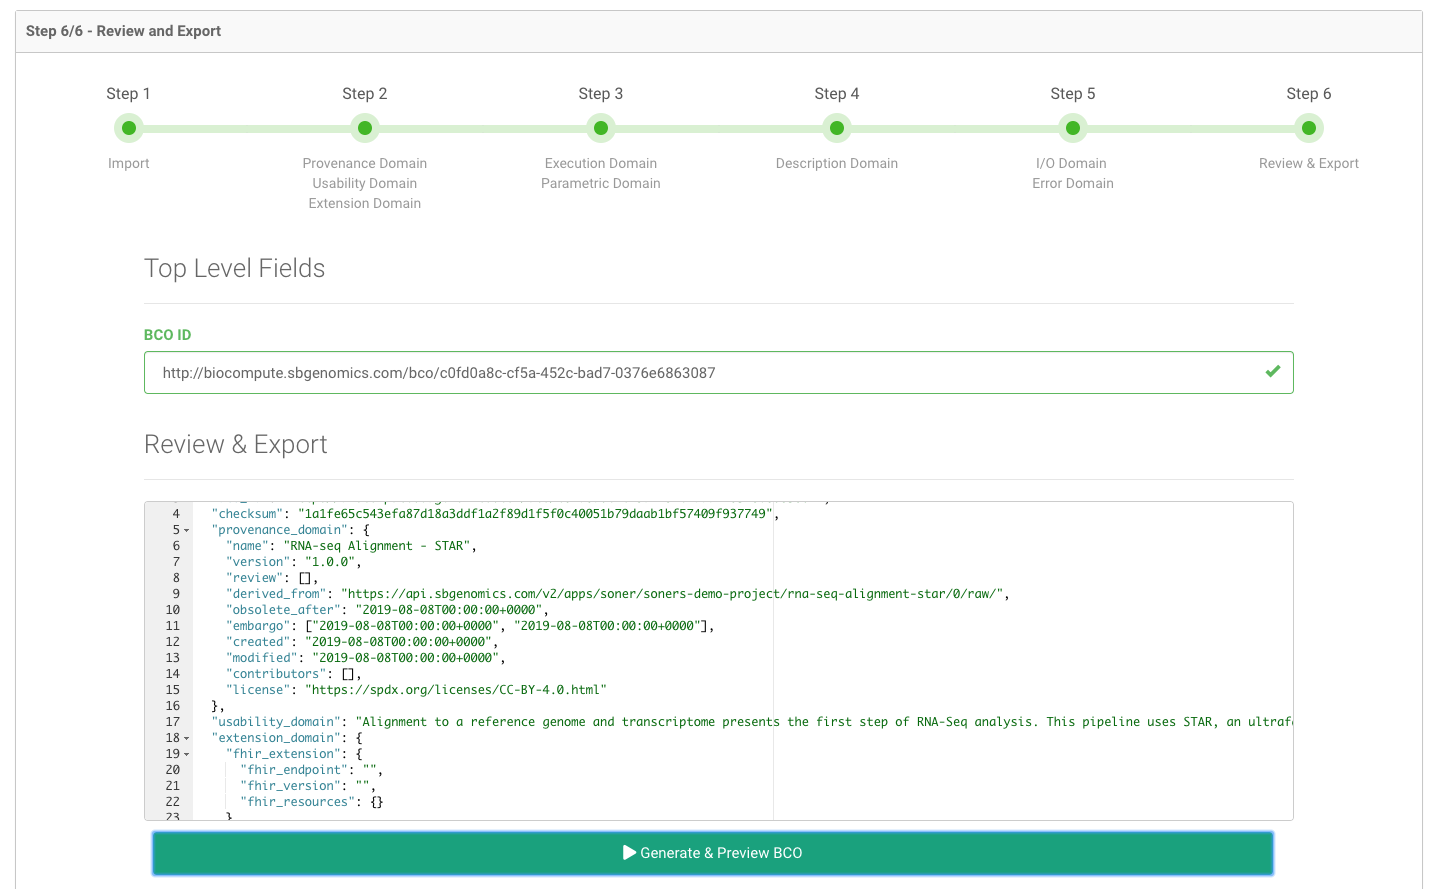
Review the generated BCO file
The BCO App includes several BCO export features (Figure 11). A user can export a BCO file in JSON file format, “Export as JSON”. The generated BCO file is downloaded as a JSON file (Figure 12).
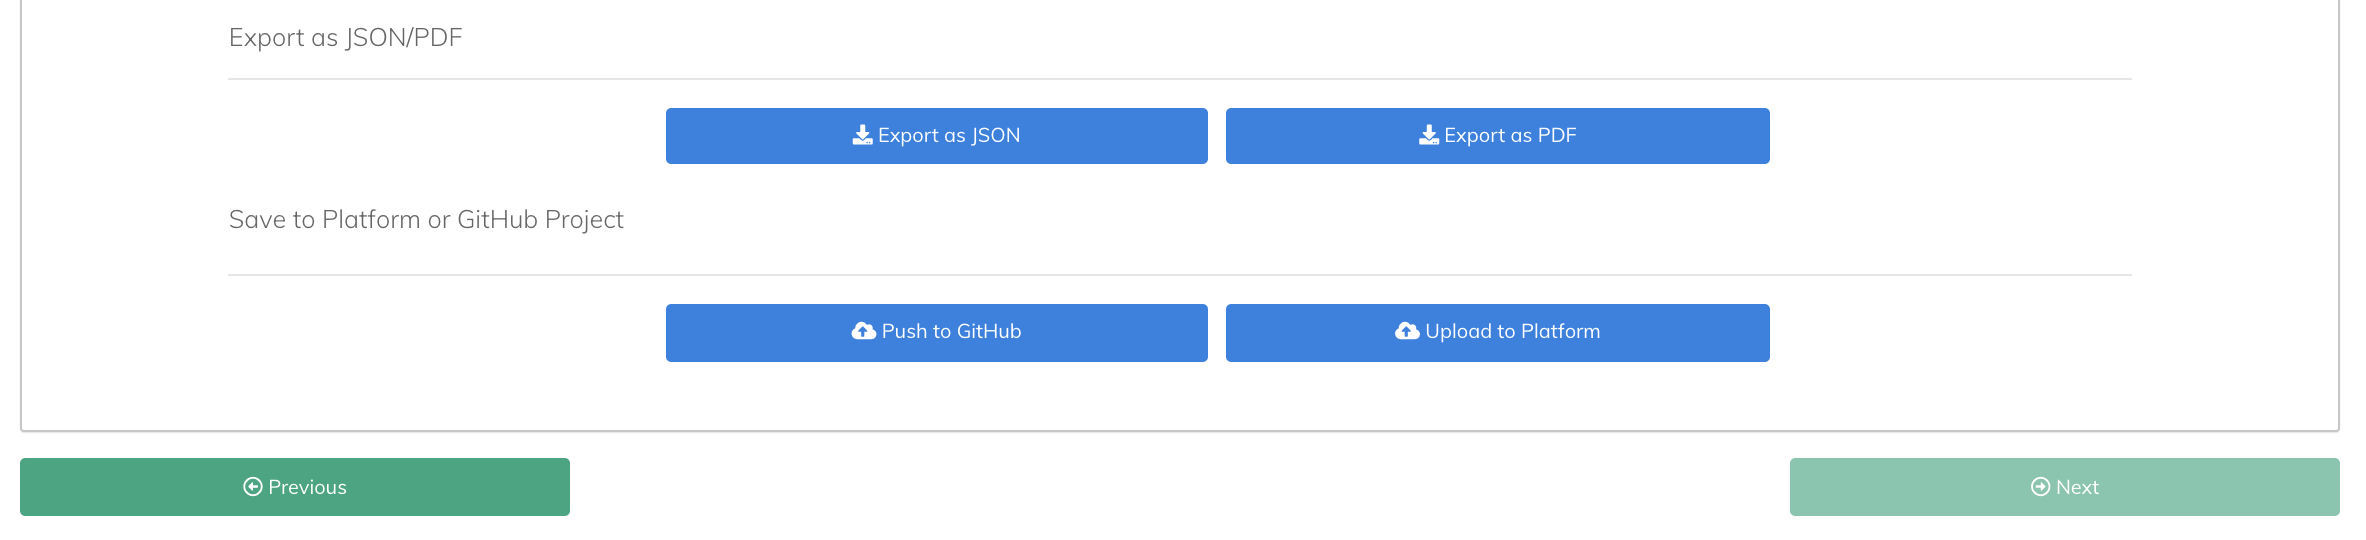
Export and save features
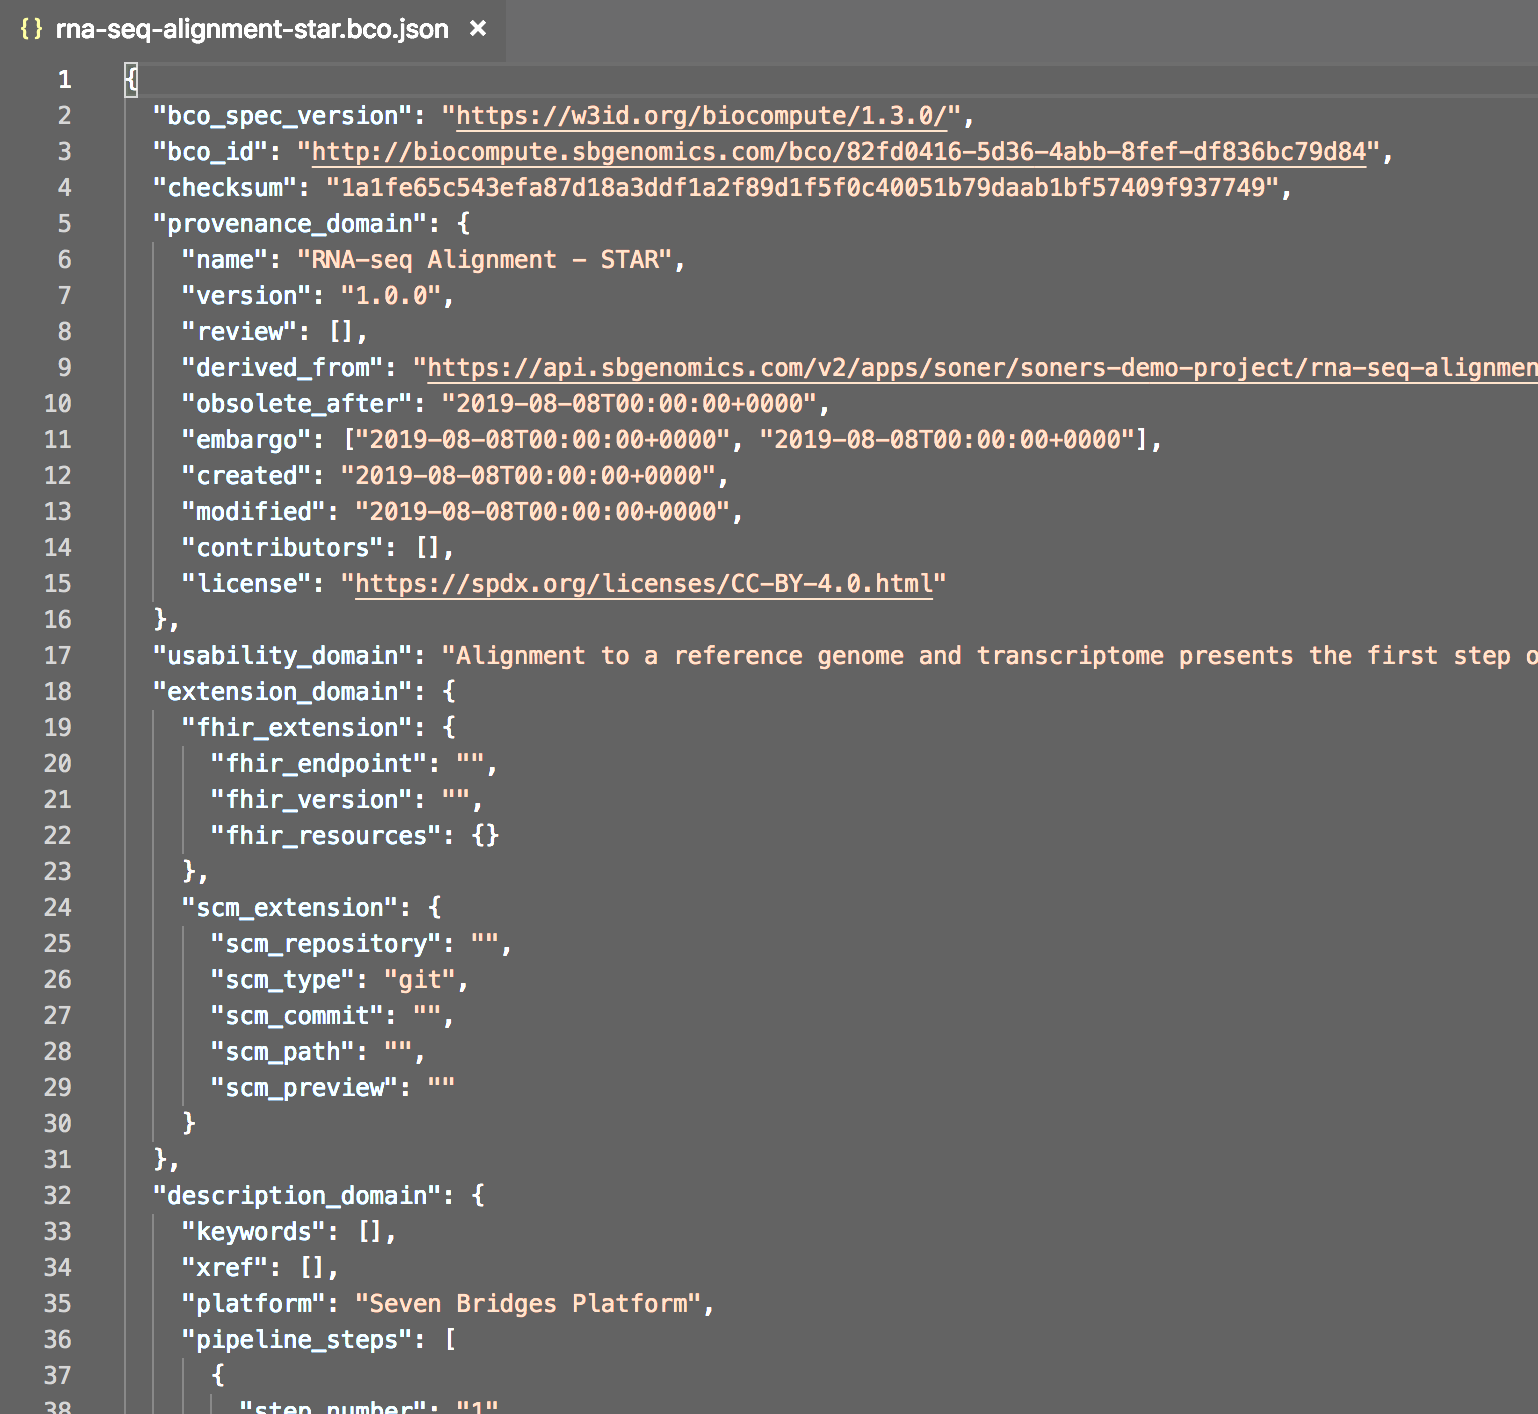
Example View of the Downloaded BCO JSON file
Users can also generate a PDF reports for the BioCompute Object with “Export as PDF” button. The report includes human readable summaries for all the BCO domains, the BioCompute Object specification, and the raw JSON of the generated BCO:
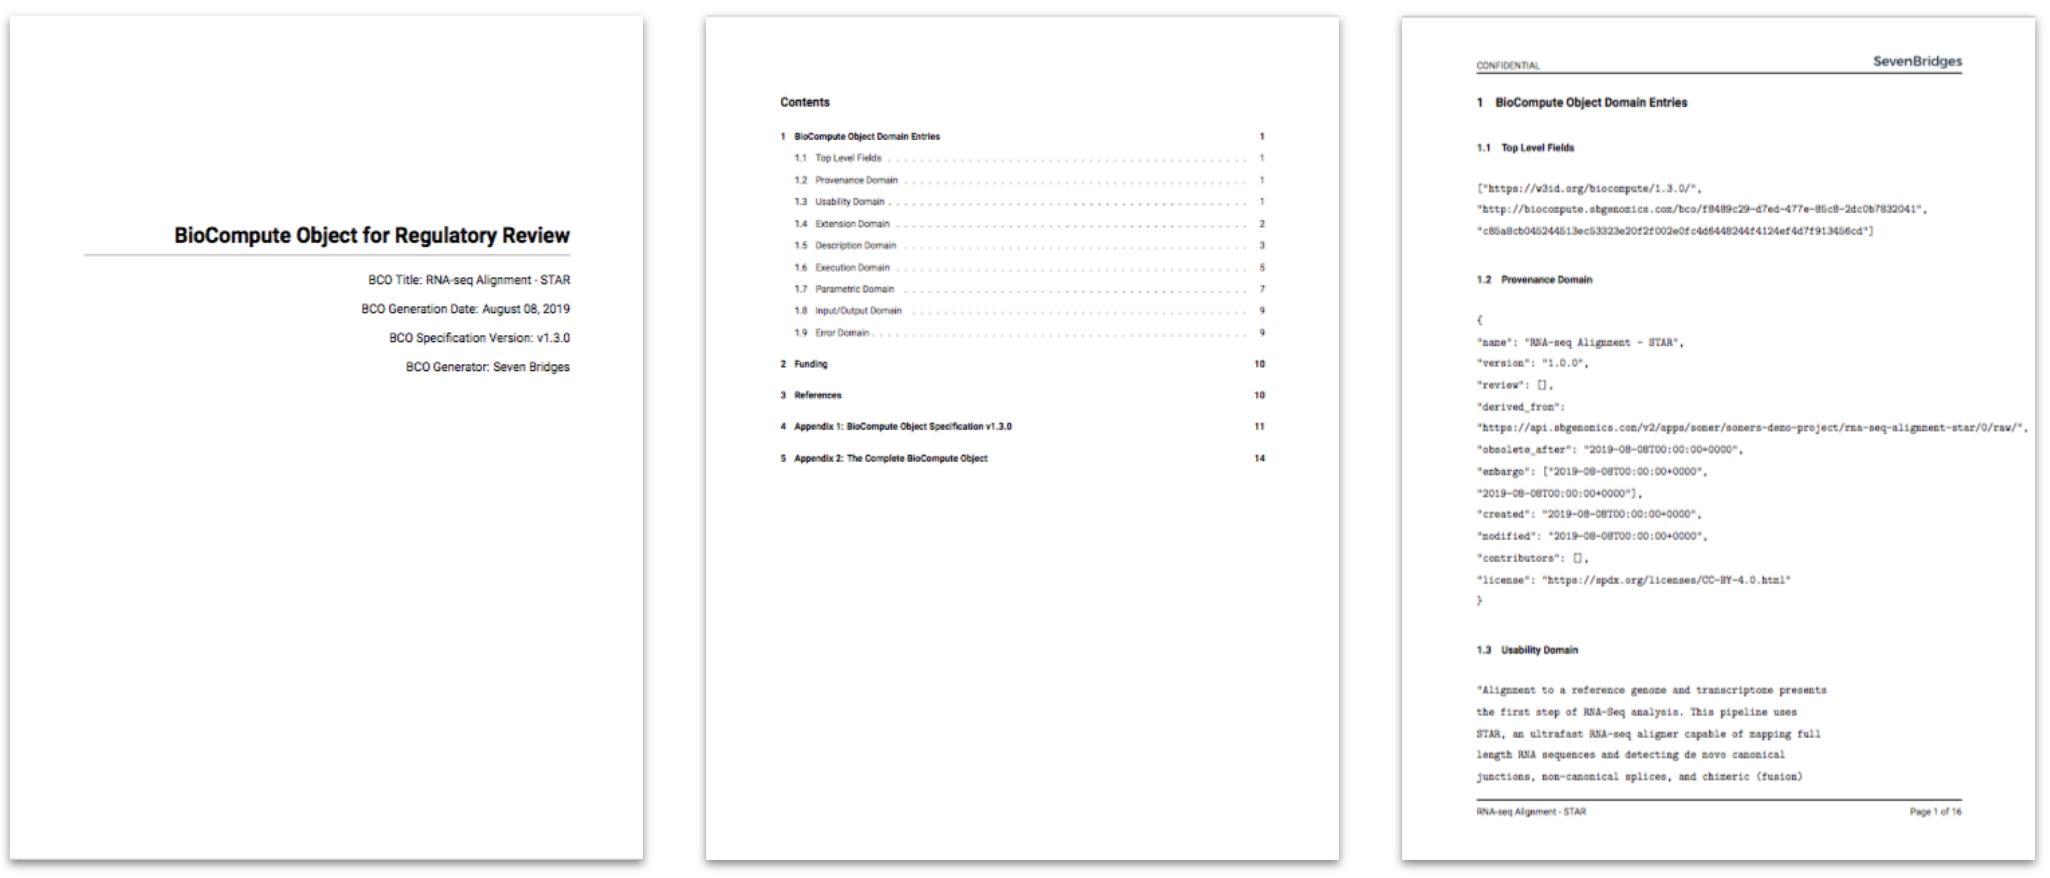
Example View of the Generated PDF Report in Step 6
In addition to export features, there are two very useful save features in the BCO App: Save to the Platform and Save to GitHub.
The first one is Save to the Platform, automatically saves the generated BCO file into “BCO” folder under “Files” of your project. You can see the example of the generated files in the project’s “Files/BCO” folder in Figure 14.
Also, there is no need to open the platform in the external browser window. When “Save to the Platform” button is clicked, the direct link (to the platform) appears near the “Upload Succeeeded” warning to access the generated file on the platform easily (Figure 15).
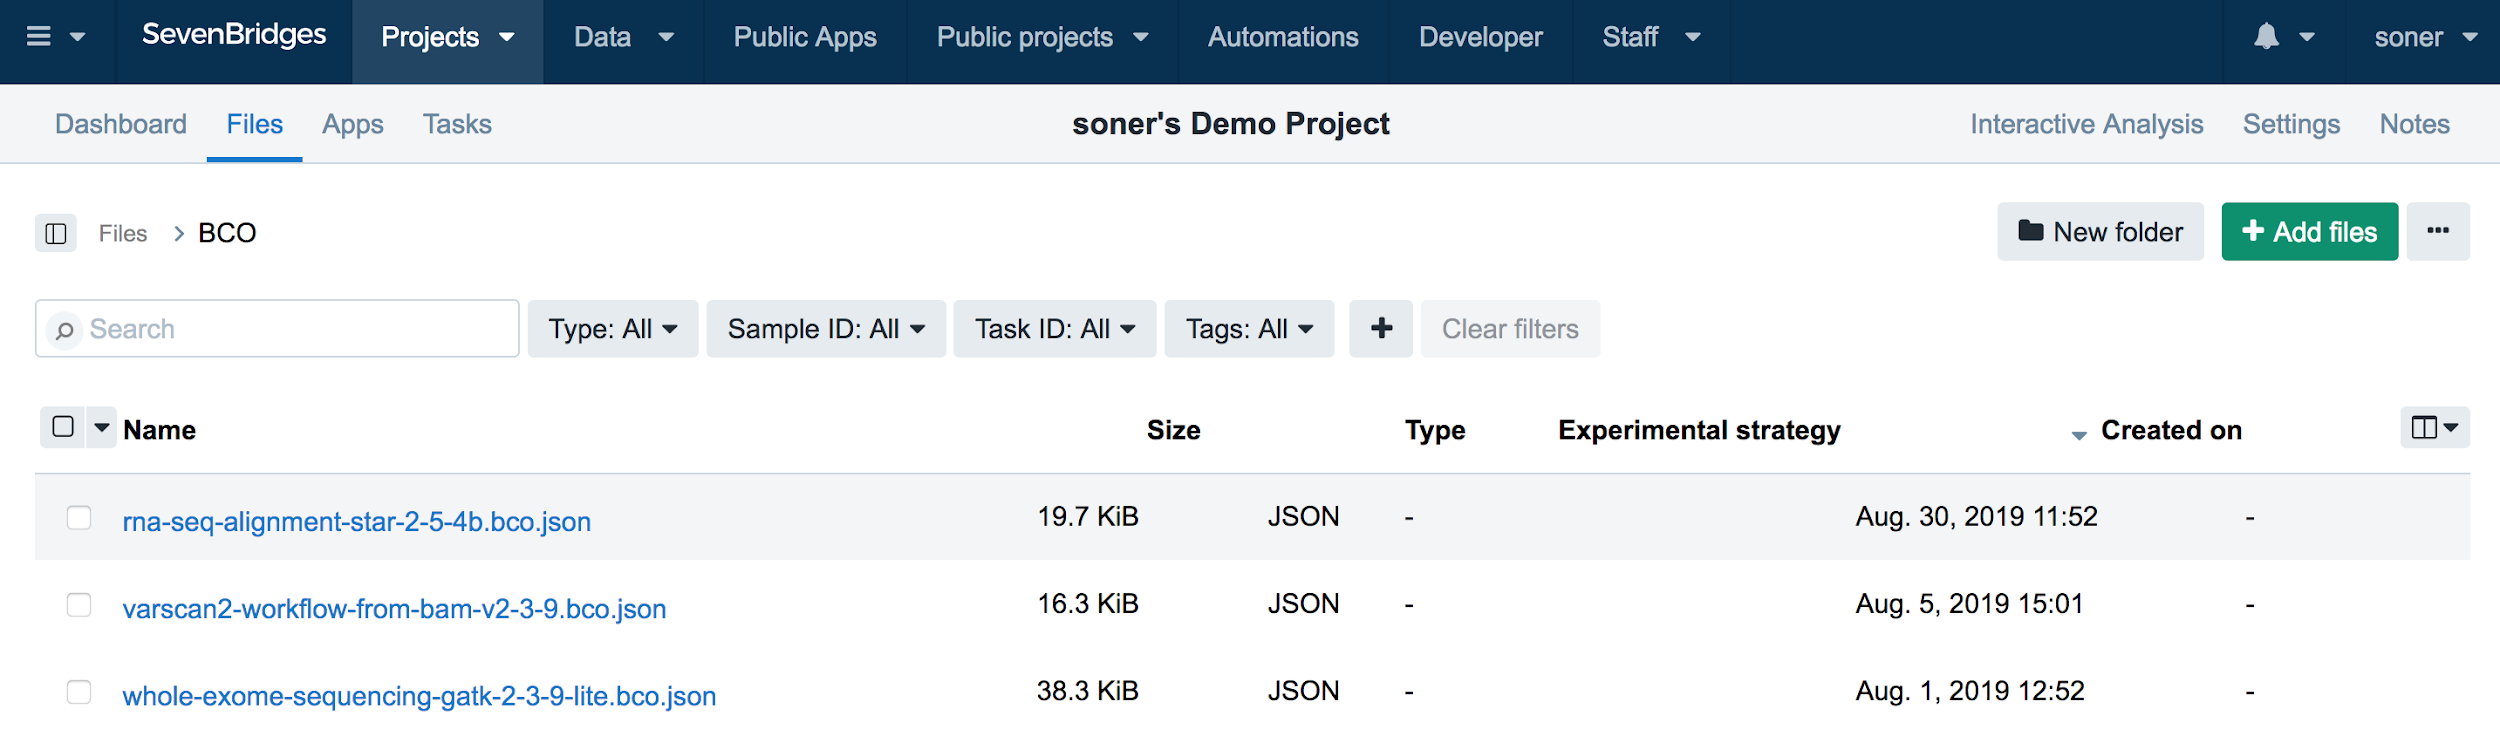
Generated BCO exported to the Seven Bridges Platform.
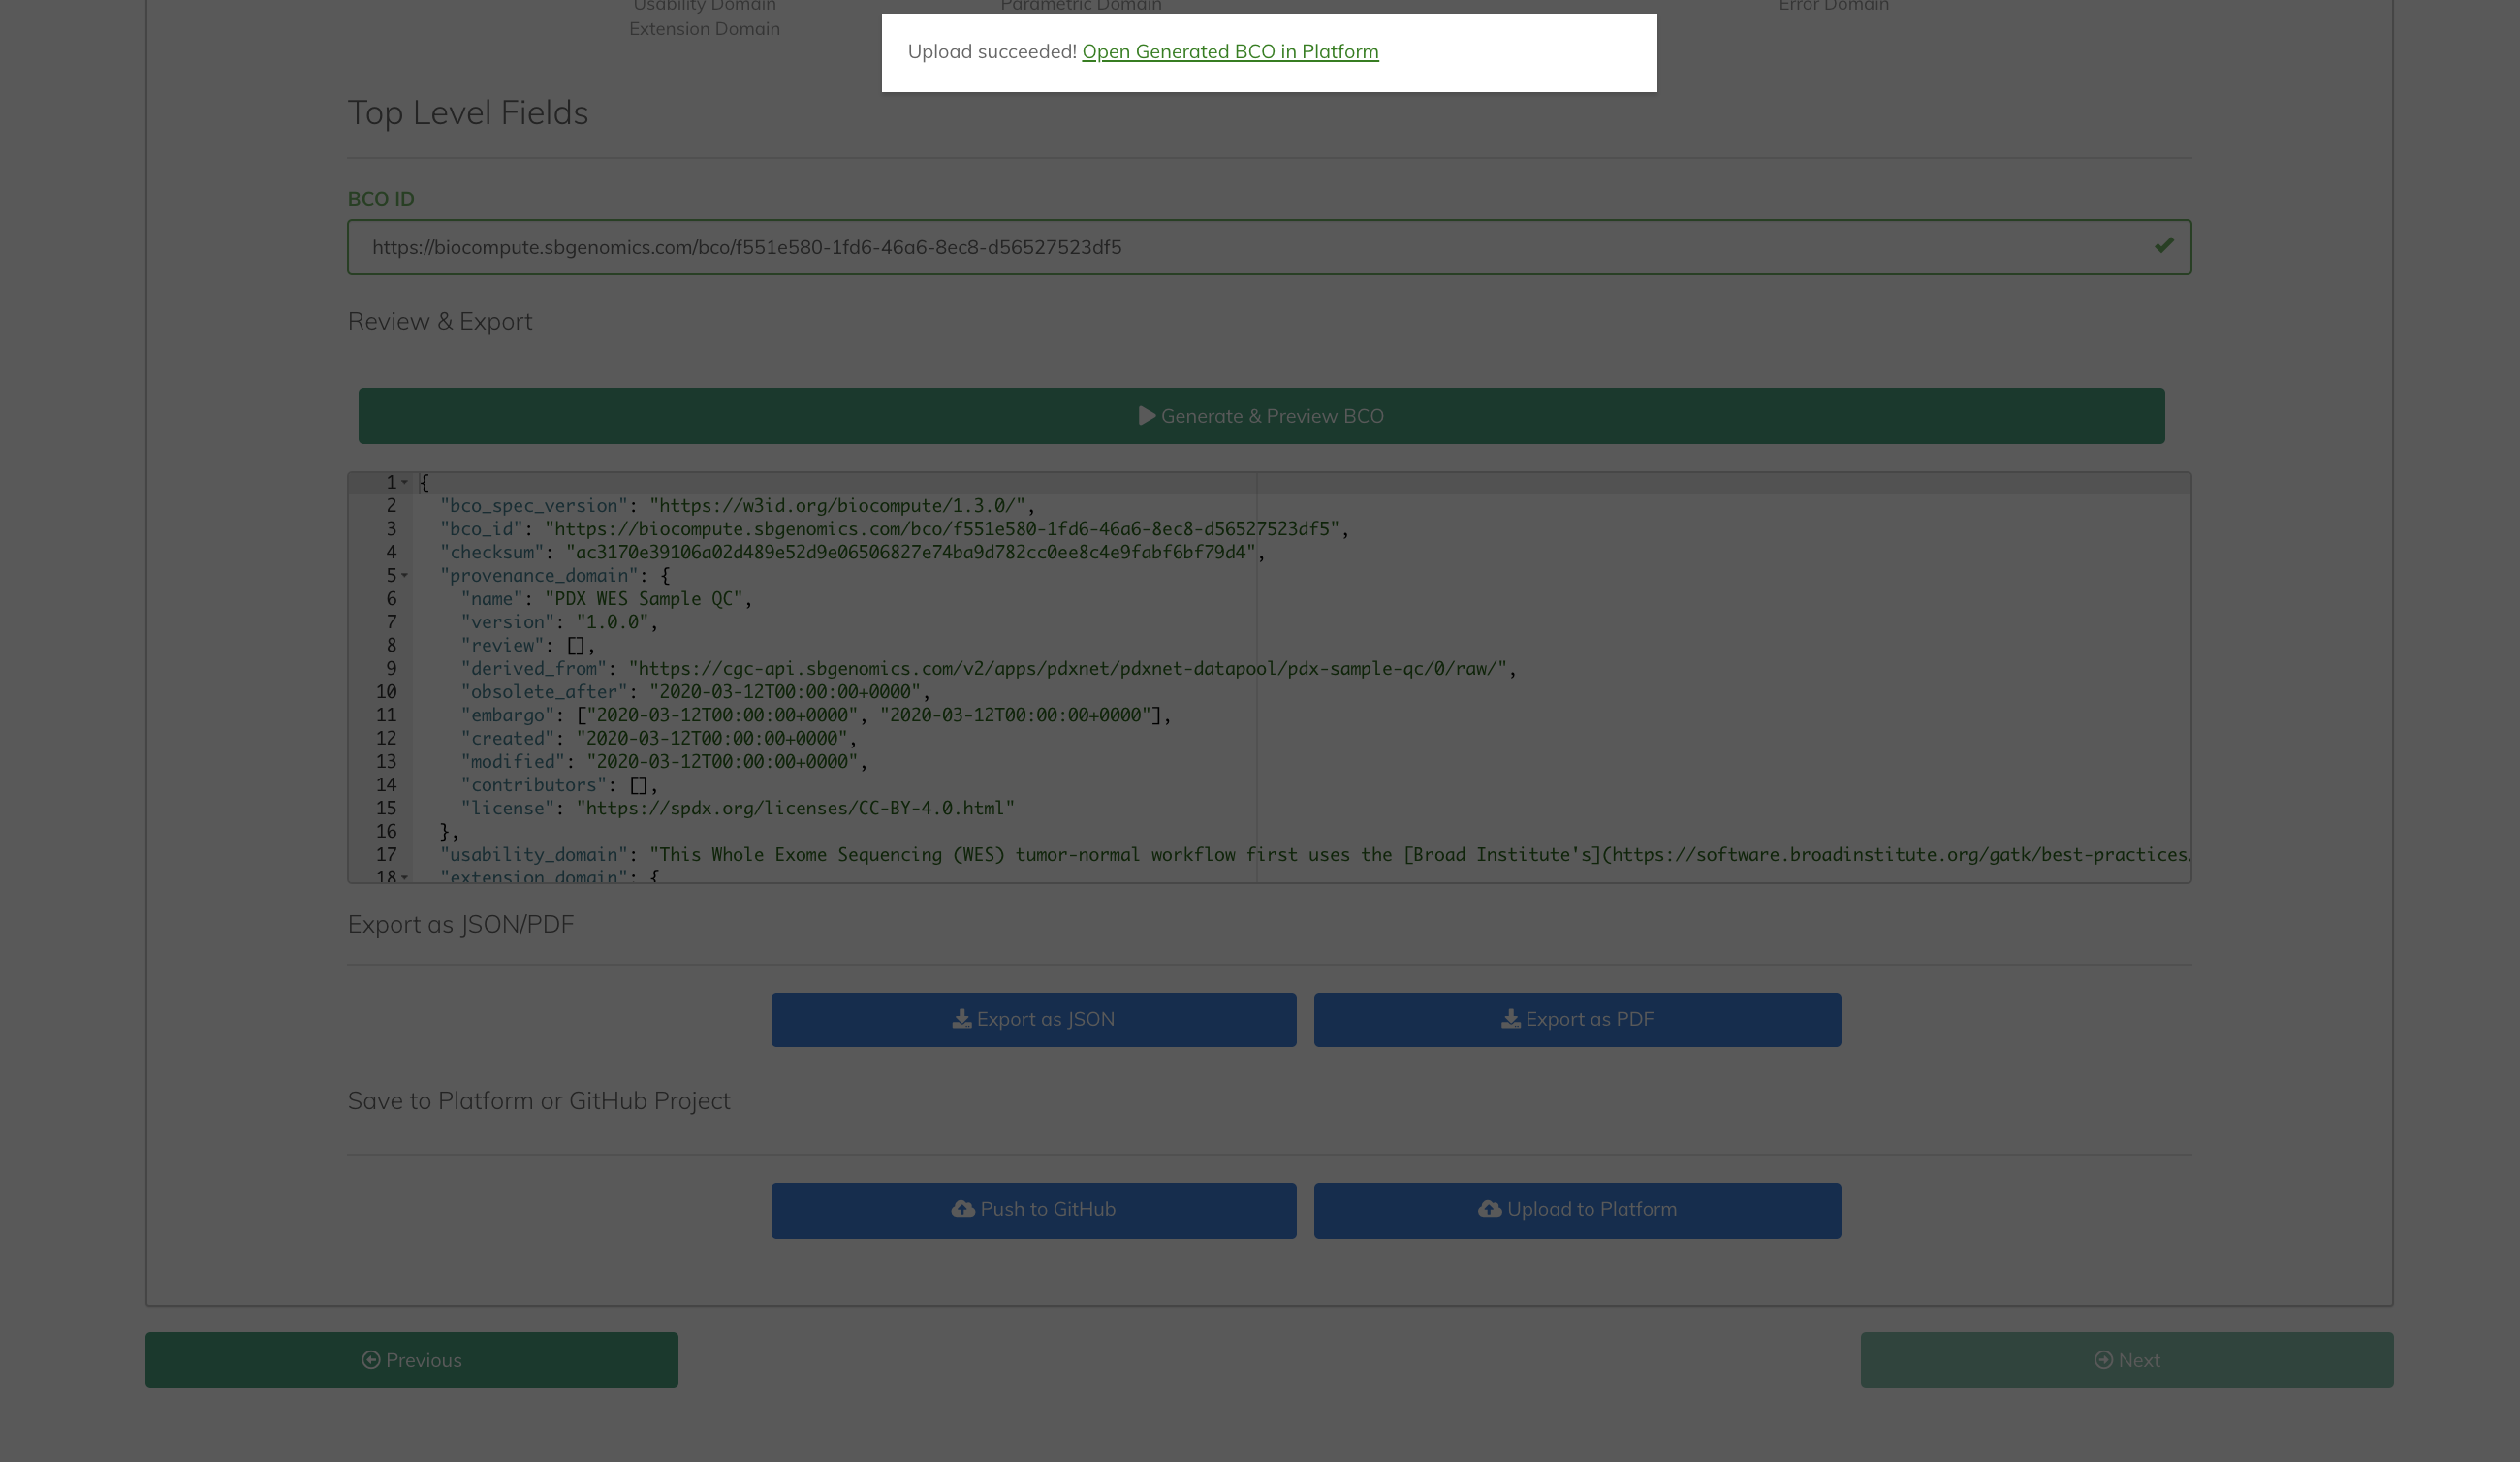
Save to the Seven Bridges Platform with direct links to the platform in Step 6.
A second way to save the generated BCO is to publish the BCO to GitHub. “Save to GitHub”, automatically saves the generated BCO file into your GitHub account. “GitHub Connection” popup window streamlines the process of publishing the BCO JSON file to your git page (Figure 16).
The GitHub Connection popup window requires the username and password of the user’s GitHub account to complete the connection and push operations. The user also enters the target Repository Name to push the generated BCO file. The Git Commit Message contains GitHub response messaged that may include indication of a successful or failed operation.
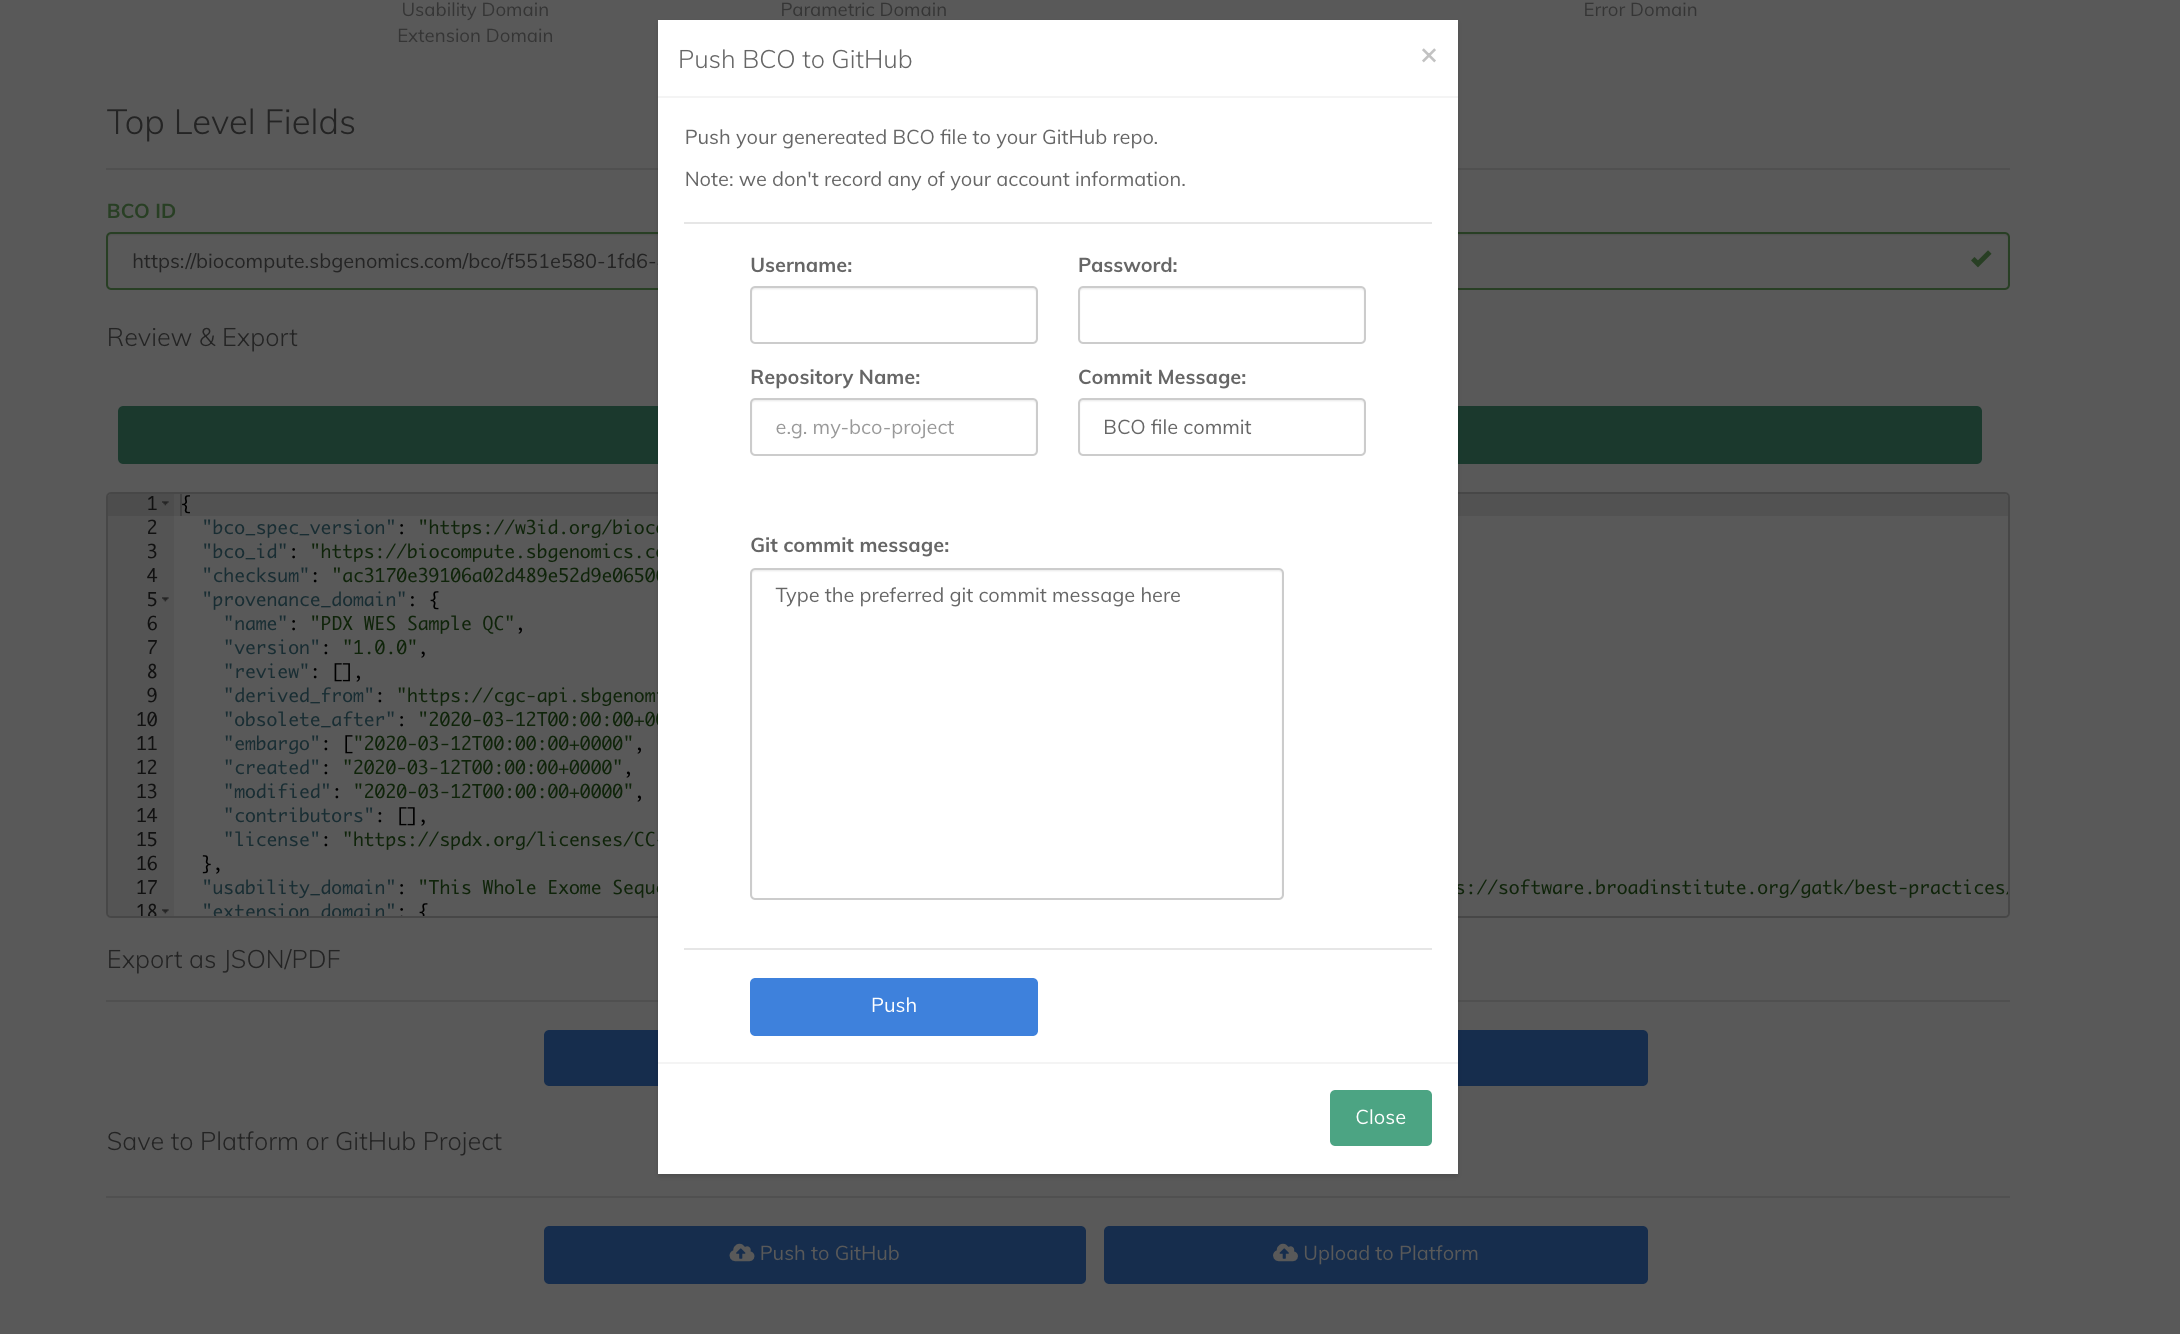
GitHub connection window in Step 6